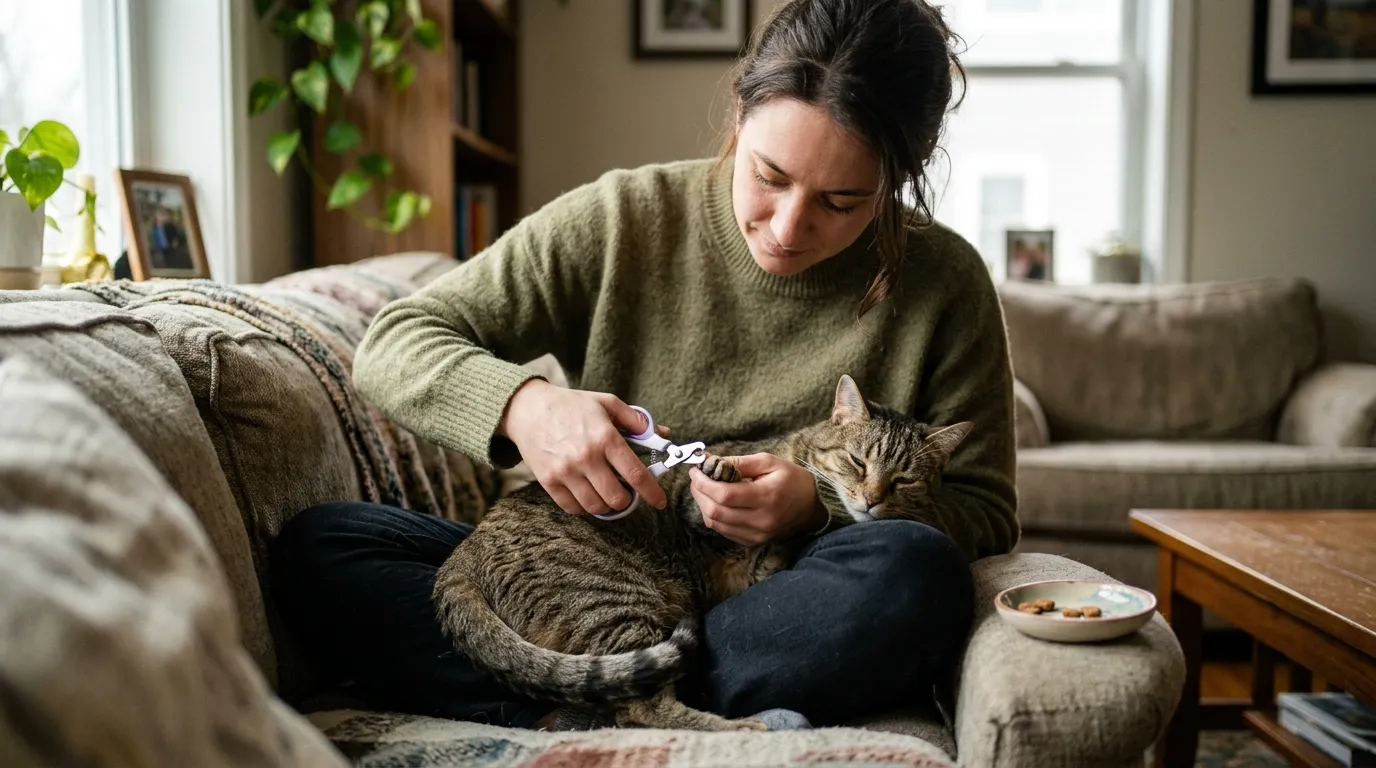
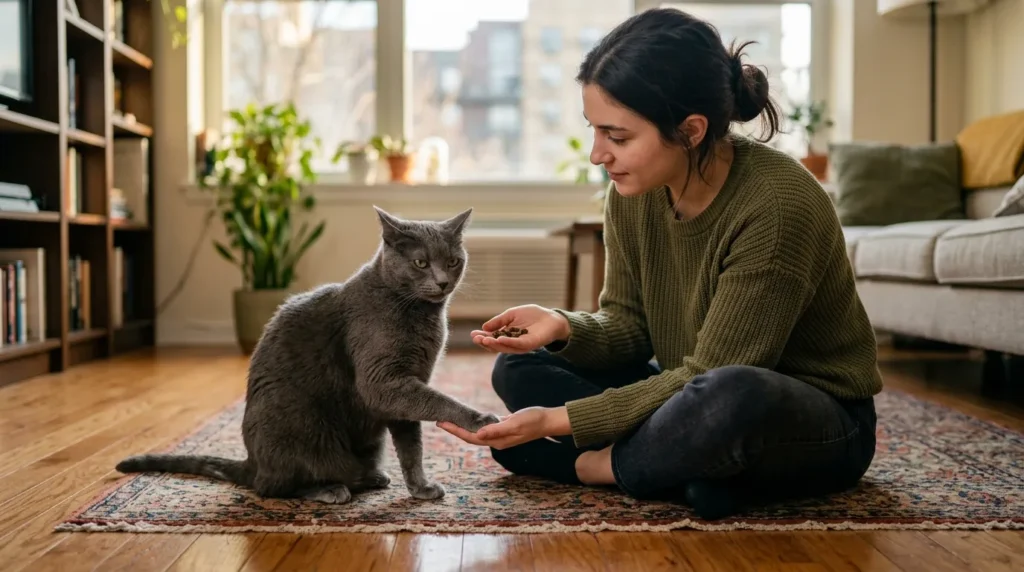
The first time I tried to trim my cat’s nails she ended up under the bed and I ended up slightly bleeding from a scratch that came out of nowhere. Learning how to trim cat nails at home properly changed everything about that experience. It turned out the problem was not my cat and it was not the clippers. It was the approach. Indoor cats never wear their nails down naturally the way outdoor cats do on rough surfaces and pavement so regular trimming is not optional for apartment cats. This guide covers the exact technique step by step, how to find and avoid the quick, what to do if you nick it and how to handle a cat who currently wants nothing to do with any of this.
How to trim cat nails at home: press the paw pad gently to extend the claw, identify the pink quick inside the nail and cut only the clear sharp tip two millimeters clear of it at a 45-degree angle. Use cat-specific clippers. Reward immediately. Do two to three nails per session at first and work up from there.
Why Indoor Cats Need More Frequent Nail Trimming Than You’d Expect?
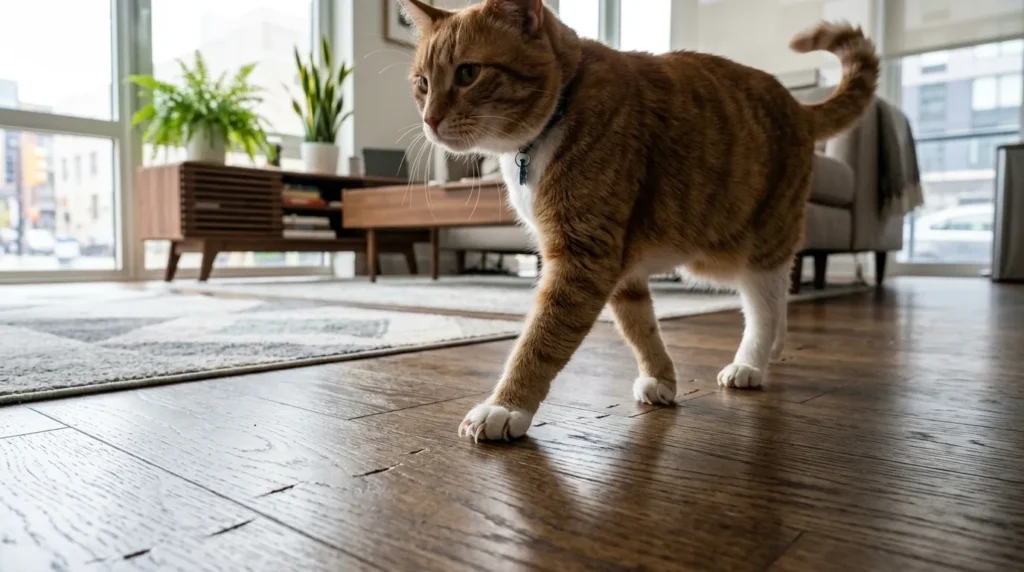
Indoor cats need trimming every two to four weeks because their nails never encounter the rough outdoor surfaces that would naturally file them down. Pavement, bark, gravel and hard soil all wear outdoor cat nails as part of daily movement. An apartment cat’s nails grow unimpeded and the first sign most owners notice is a clicking sound on hardwood or tile.
Overgrown claws in indoor cats cause real problems. A nail that grows too long curves toward the paw pad and in severe cases grows into the pad itself, causing infection and serious pain that requires veterinary treatment. That outcome is entirely preventable with a consistent trimming schedule. Two to four weeks for adults, ten to fourteen days for kittens whose nails are extremely sharp and grow fast.
According to the ASPCA’s cat care guidelines, regular nail care is one of the most important components of indoor cat maintenance and is directly linked to preventing injury to both the cat and the people living with her. Understanding your cat’s full indoor cat health picture helps you build grooming into a routine rather than reacting to problems after they develop.
The Right Tools for Trimming Cat Nails at Home
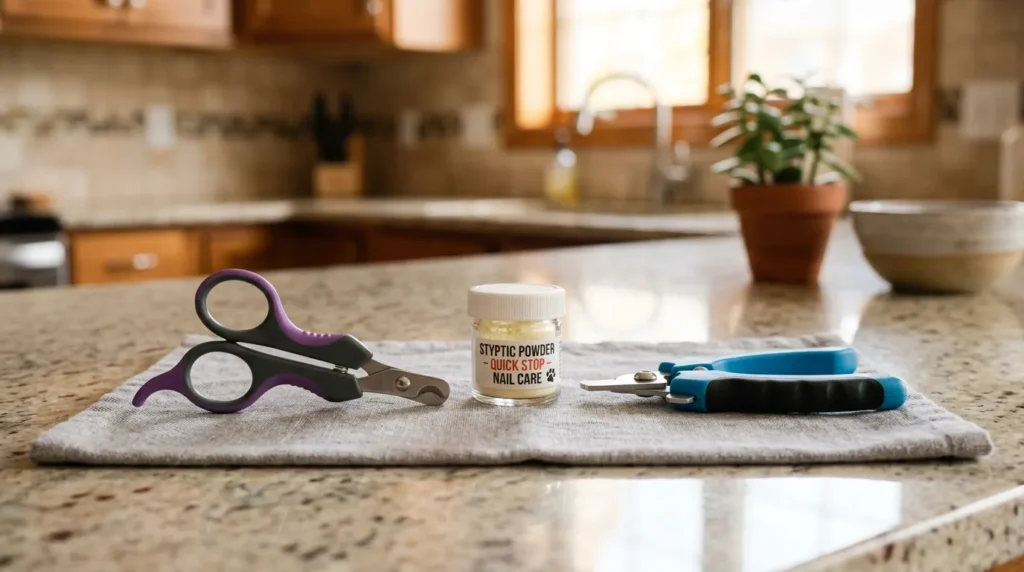
Scissor-style cat nail clippers are the right choice for most indoor cats. They give you a clear view of the nail before you cut and they offer precise control over angle and depth. Most owners find them more intuitive than plier-style because the motion is familiar and the blades position around the nail in a way that makes it easy to see exactly what you are about to cut.
Plier-style clippers work better for large breeds or senior cats with thick dense nails. The mechanical leverage makes cutting through a dense claw much easier than scissor style allows. Whichever style you choose, the blades must be sharp. A dull blade compresses the nail before cutting it and that squeezing sensation is what makes cats dread future sessions far more than a clean sharp cut would.
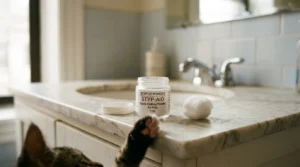
Keep styptic powder within reach every single time you trim. If you nick the quick, it stops the bleeding in seconds and reduces your cat’s discomfort significantly. Cornstarch works as a substitute if you do not have styptic powder but buy the real thing before your first session rather than improvising during a stressful moment.
How to Trim Cat Nails at Home Step by Step?
Wait until your cat is relaxed, ideally after eating or during a dozing session. Pick a spot she already associates with positive experiences. Do not chase her down and start trimming. If she comes to you and settles, that is the window. If she walks away, let her go and try in an hour.
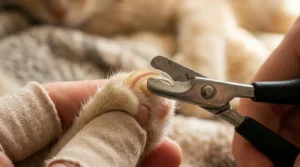
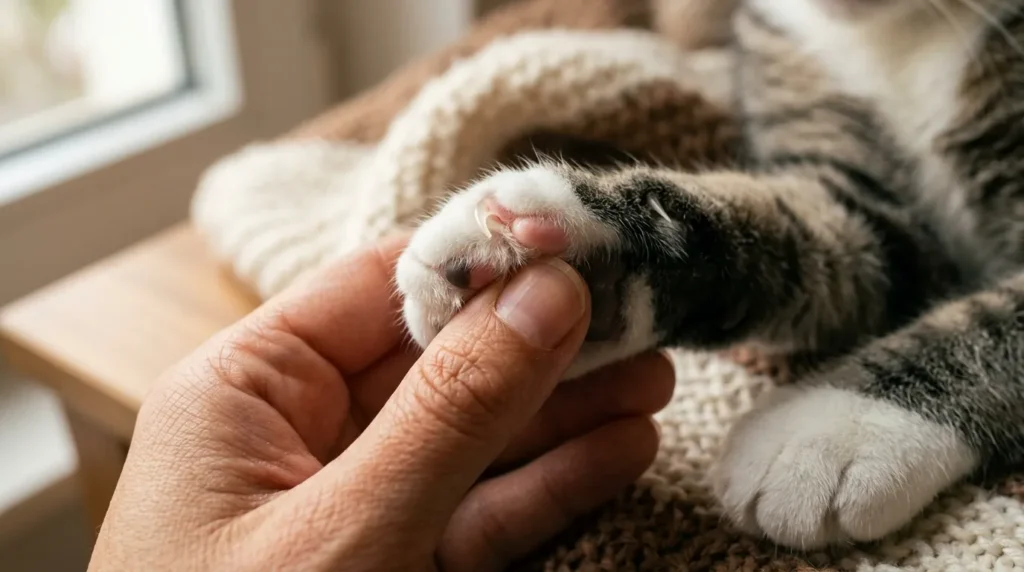
Gently hold one paw and press the center of the pad with your thumb. The claw will extend forward automatically. Look at the nail in good light. You will see a clear curved section at the tip and a pink area at the base. That pink area is the quick, which contains the blood vessel and nerve. Your cut goes in the clear zone only, at least two millimeters before the pink begins.
Position your clippers at a 45-degree angle across the nail and make one clean, confident cut through the tip. Hesitant or slow cuts crush the nail instead of slicing it cleanly. After each nail, offer a small treat immediately. Do not wait until the entire paw is done. Reward nail by nail so your cat associates each individual clip with something good happening directly after.
Start with two or three nails per session if your cat is new to this. End every session before your cat signals she wants to stop. A successful two-nail session is a better outcome than a complete ten-nail session that ended badly.
How to Find the Quick on Clear and Dark Cat Nails?
On clear or white nails, the quick appears as a distinct pink triangular shadow inside the nail starting from the base. Stay two millimeters clear of it and you will not bleed your cat. The margin looks very small when you are looking at it for the first time but it is enough space to remove a meaningful amount of the sharp tip.
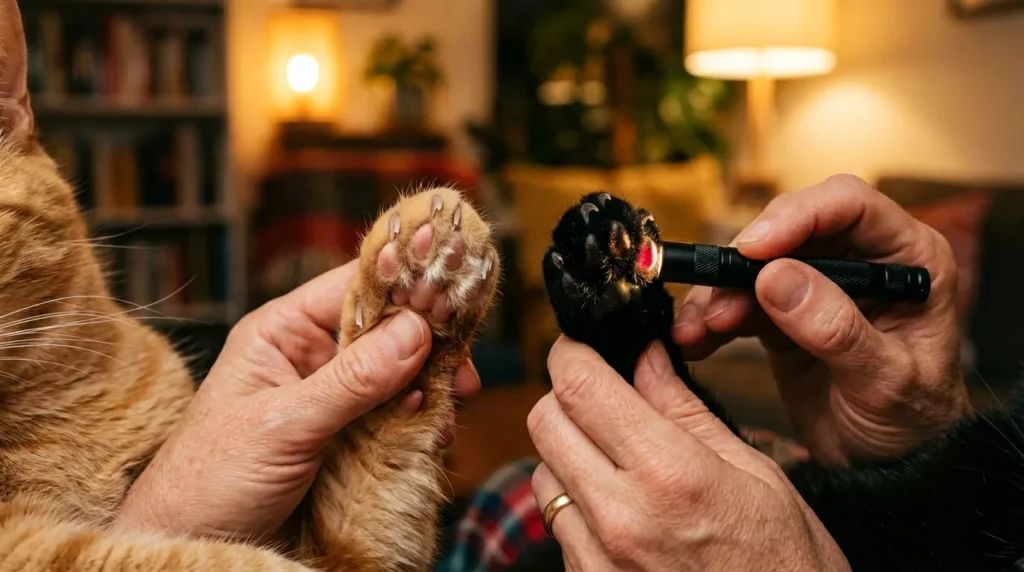
Dark or black nails require a different approach. Press a small flashlight against the side of the nail to light it from within. This back-lighting reveals the internal blood vessel as a dark oval shadow. Stop your cut well before that shadow begins. If you cannot see anything clearly with the flashlight, take off only the very end of the hooked tip where the nail is thinnest and most obviously past the quick zone.
A good rule for dark nails: cut a tiny sliver and then look at the cross section of the cut nail. A white or gray center means you are safely in the tip. A small dark dot appearing in the center means you are approaching the quick. Stop immediately when you see that dot.
What to Do When You Accidentally Cut the Quick?
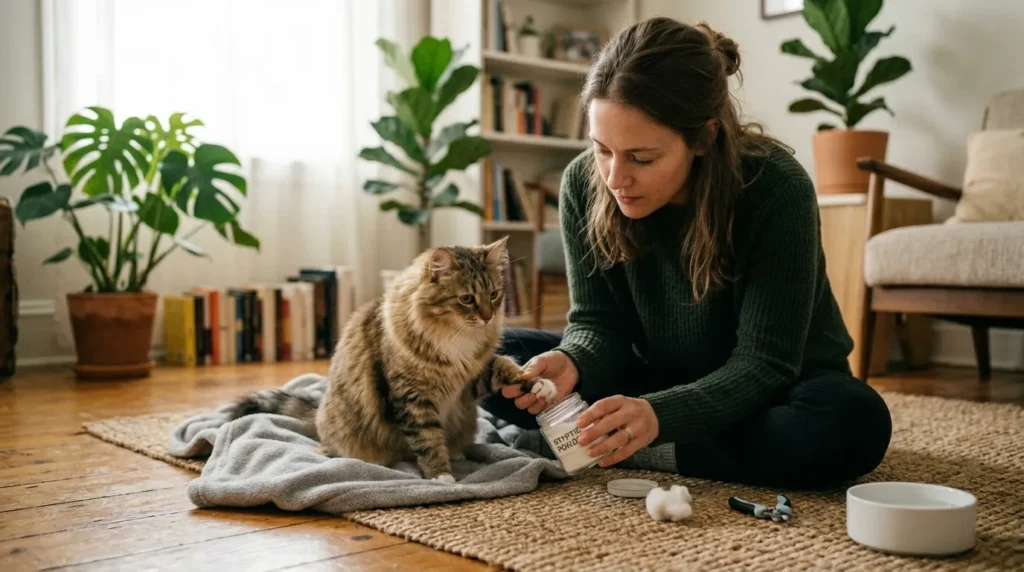
Nicking the quick happens to everyone who trims cat nails regularly enough. It looks alarming because the blood is bright and visible on a white surface but it is rarely serious. Dip the tip of the nail into styptic powder and hold gentle pressure with a cotton ball for thirty seconds. The bleeding typically stops within two minutes.
If you do not have styptic powder, press a pinch of cornstarch firmly against the nail tip. It is not as effective as styptic but it creates enough of a clotting surface to slow and stop the bleeding while you get proper supplies. Give your cat extra treats, a quiet space and genuine gentleness after this happens. She did not do anything wrong and neither did you. It was a learning session.
Monitor the nail over the next 24 hours. Swelling, discharge or significant limping warrants a vet call. A simple quick nick with normal healing does not require veterinary attention. Keep the indoor environment calm and clean while it heals.
How to Handle a Cat That Refuses Nail Trimming?
Desensitization is the only reliable long-term solution for a cat who panics or bites at the sight of clippers. It takes time but it works. Spend three to five minutes every day simply touching and handling your cat’s paws without picking up the clippers at all. Pair every touch with a high-value treat. Do this for a week before introducing the clippers into the room at all.
On days five through seven, introduce the clippers but do not use them. Set them on the couch beside your cat during a treat session. Let your cat sniff them. Click them once near her paw and immediately give a treat. You are teaching her that the sound of clippers predicts good things, not pain. That association is what makes future sessions possible.
A full step-by-step guide to grooming your indoor cat at home covers how nail care fits alongside brushing and other handling routines. Cats who are handled regularly across their body, including paws, ears and face, tolerate grooming sessions significantly better than cats who are only touched during necessary procedures.
From Experience: The towel wrap technique works for genuinely aggressive cats but it is a last resort, not a first step. If your cat needs wrapping every time, the sessions are not building trust. They are just getting the nails done. Invest in the desensitization process even if it takes three weeks. A cat who tolerates trimming calmly is a gift that keeps paying for years.
The Mistake That Makes Nail Trimming Harder Every Time

Pushing through a session after your cat signals discomfort is the mistake that makes every future session harder. A twitching tail, pulled-back ears, a low growl or a sudden stiffening of the body are all clear signals to stop. Ending the session at that moment and giving a treat anyway teaches your cat that showing discomfort ends the uncomfortable thing. That is actually a useful communication tool rather than a failure.
The connected mistake is skipping the treat timing. Offering a treat a minute after each nail rather than immediately after loses the association your cat’s brain needs to form. Cats learn through immediate consequence, not delayed reward. The treat needs to happen within three seconds of the clip for the positive connection to register properly.
Keeping enrichment and play consistent outside of grooming sessions builds the overall relationship quality that makes grooming sessions possible. A cat who trusts you in play, in feeding and in daily handling extends that trust to grooming. A cat who only experiences handling during nail trims has no other positive context to draw on.
Good indoor cat care habits across the board create a cat who is easier to groom, not because you trained grooming specifically but because you built a relationship that tolerates brief moments of mild discomfort. Understanding your cat’s behavior signals during grooming is as important as knowing which end of the clippers to hold.
When to Stop Trimming at Home and See a Professional
A nail that is curled fully into the paw pad requires veterinary treatment, not a home trimming session. Signs include a cat limping, licking one paw obsessively, a visible wound near the nail bed or discharge and swelling around the paw. These are not trimming problems anymore. They are medical issues that need proper attention.
If your cat’s nails have become brittle, split easily or look unusually thick, that change in nail structure can indicate nutritional deficiency, thyroid disease or kidney problems rather than a grooming gap. Healthy nails should cut cleanly without crushing or splintering. A consistent feeding routine that includes quality protein directly supports nail and coat health. A sudden change in nail texture alongside litter box changes or appetite shifts warrants a vet conversation. Adding appropriate scratching furniture also helps maintain nail condition between trimming sessions by giving cats a surface to work on naturally.
This article is for informational purposes only. Always consult your vet if you have concerns about your cat’s health.
Frequently Asked Questions About Trimming Cat Nails at Home
How often should I trim my indoor cat’s nails?
Most indoor cats need trimming every two to four weeks. Front paws grow faster and cause more furniture and skin damage so check them first. Kittens need trimming every ten to fourteen days because their nails grow rapidly and are needle-sharp. Senior cats may need more frequent checks if they have stopped using scratching posts and nails are thickening.
What happens if I accidentally cut the quick?
Apply styptic powder immediately by dipping the nail tip into the container and holding gentle pressure for thirty seconds. If you do not have styptic powder, use cornstarch as a temporary substitute. The bleeding stops within one to two minutes in most cases. Give your cat treats, reassurance and a quiet space afterward.
Can I use human nail clippers on my cat?
No. Human clippers are designed for flat nails and crush a cat’s round claw rather than slicing through it cleanly. That compression causes pain during the cut and makes the nail more likely to split. Cat-specific scissor-style or plier-style clippers are inexpensive and designed for the exact curvature and thickness of feline nails.
How do I trim the dewclaws?
The dewclaw sits further up the inside of the front leg and never touches the ground so it never wears down at all. Check dewclaws every trimming session and trim them on the same schedule as the other nails. An overlooked dewclaw will curl and grow into the leg, causing significant pain and requiring veterinary treatment to correct.
What if my cat absolutely will not let me trim their nails?
Start with paw desensitization before touching the clippers. Handle your cat’s paws daily while giving treats for one to two weeks before introducing clippers to the routine. Most cats who resist trimming do so because the experience has been stressful in the past. Rebuilding the association takes time but it works. If a cat is genuinely aggressive about it, a professional groomer or vet is the right call rather than a battle that damages your relationship.
How to trim cat nails at home requires pressing the paw pad to extend the claw, identifying the pink quick inside and cutting only the clear tip two millimeters clear of it at a 45-degree angle using cat-specific clippers. Indoor cats need trimming every two to four weeks because they lack rough outdoor surfaces to wear nails down naturally. Styptic powder stops bleeding if the quick is nicked. Desensitization with treats over one to two weeks makes resistant cats tolerate trimming reliably.
Written by Mishu
A passionate cat lover and indoor living enthusiast, Mishu is the founder and voice behind Indoor Living Cat – a go-to resource for cat owners who want to create the happiest, healthiest life for their feline companions indoors.
View Full Profile